
Chủ Nhật, 14 tháng 12, 2008
Night

Chủ Nhật, 7 tháng 12, 2008
Montage

This is the montage work which i made for my assignment. The work itself is simple, with only 8 objects blend together to create the meaning i want to define. The main concept in this montage is "lonely". The picture of a man with his head down provides a very solitary feeling. The man looks lonely with just 1 candle and a gift on the single table in the room. The room is rather big, while the candle just barely light the room. The feeling itself is isolated. Beside, a family's old photo behind him is just half hanging, while it is in black and white. The man is single, and completely isolated. He doesn't have anything for himself, not even a relative left. He wants to give the gift for someone, but he doesn't have any. He himself was covered by the dark atmosphere in the corner of his own dream.
Face

Lately, i have been trying in blending and manipulating stuff. The picture above is a result of several attempts in creating a distort face. The original photo which i based on can be found here http://www.sxc.hu/photo/1113322 .
The concept behind this work is about the devastation of time, the abstract meaning of each part of a face. The original photo itself has been changed and recreated several times. The eyes were made from 2 screw objects while the mouth was replaced by a zip. We can see a real eye beyond the "mask". The face itself is like a real face as well as a mask wearing by the woman. It is like a barrier of lies and tricks to prevent the outside get in. The mouth was zipped and her mind was seal, she cannot communicate with the outside world and otherwise.
The concept behind this work is about the devastation of time, the abstract meaning of each part of a face. The original photo itself has been changed and recreated several times. The eyes were made from 2 screw objects while the mouth was replaced by a zip. We can see a real eye beyond the "mask". The face itself is like a real face as well as a mask wearing by the woman. It is like a barrier of lies and tricks to prevent the outside get in. The mouth was zipped and her mind was seal, she cannot communicate with the outside world and otherwise.
Chủ Nhật, 30 tháng 11, 2008
Help

This is an ancient exercise that existed ages ago. Now i will dig it up and redo it. Well, in truth, this is a practice for the assignment 2 which is coming up. The blending technique is applied here. I find that it is really useful to make object different from its original form. In this exercise, i do not repeat exactly what the tutorial said, but instead i try to make go other ways. The picture this time has a more of a horror feeling. I like horror, therefore i made it look like a horror movie. In fact, i attempted to make a horror movie poster. I even thought of a plot for this imaginary movie. The plot should star a female character who was trapped in the maze of her own mind. She tried to get out of all the illusions while seeking for help. In the picture, i only used clipping mask once time to make the the eyes blend in the background. I also added some blood, gore, and even some blood vessels on the eyes.
The "K"

This is the letter "K" i made for the exercise in the class. The idea behind this letter was when i came across the symbol of the Griffindor in the famous series Harry Potter. It was a Griffin, and then the Slytherin symbol, which was a snake. I took the idea of making the "K" looks like a three-head snake, or a Hydra- mythical creature in old stories. I decide this typeface you be serif, with the head and tail of the snake to be in bigger size than the rest. Althought the sketch was pretty good, the drawing on illustrator was not very good. I still can't use Pen as fluently as a real pencil paper.
Chủ Nhật, 16 tháng 11, 2008
Photo Edit
This week i have learned some new techniques which are mostly used in photo editing. Today i will experiment photo retouching method that i think is very impressive and adoptable to different occasions.
As we can see, below is a photo that i took of my friend, Van. She is very cute and smile very brightly.
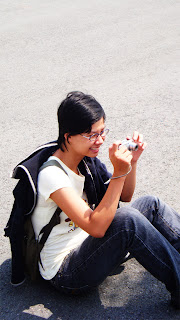
I use Photoshop to add a thin white layer and make the photo become much better. Duplicate that source layer, then apply Filter->Gaussian Blur and adjust it to an appropriate amount depend on the size of the image.
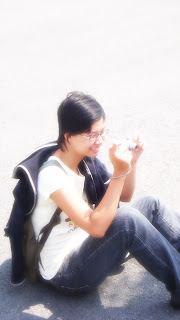
The above is the result of the first touching. We can see that the photo become much brighter and more sparkling.
Then we adjust the contrast a bit to make it more indepth using Adjustment->Brightness/Contrast and turn the contrast bar to max.
After that, to make it more glamorous, we can randomly add some shining rays of light to the photo using the following technique.
Create a new layer, then use Filter-> cloud then filter->Different cloud. Then we use Filter->Motion blur and adjust the direction of the blur the appropriate way. After that, we duplicate the layer to make it brighter. Then choose the blending option for the rays of light "Softlight"
The result is shown below
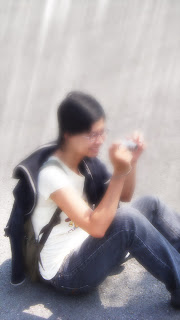
To make it even more sparkling, we can add some colours to the rays of light.
Make a new layer, then use a brush with big size and orange or yellow color to brush as follow the direction of the light. Then we apply "Softlight" blending option to it.
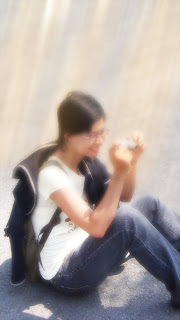
Below is the final version.
As we can see, below is a photo that i took of my friend, Van. She is very cute and smile very brightly.

I use Photoshop to add a thin white layer and make the photo become much better. Duplicate that source layer, then apply Filter->Gaussian Blur and adjust it to an appropriate amount depend on the size of the image.

The above is the result of the first touching. We can see that the photo become much brighter and more sparkling.
Then we adjust the contrast a bit to make it more indepth using Adjustment->Brightness/Contrast and turn the contrast bar to max.
After that, to make it more glamorous, we can randomly add some shining rays of light to the photo using the following technique.
Create a new layer, then use Filter-> cloud then filter->Different cloud. Then we use Filter->Motion blur and adjust the direction of the blur the appropriate way. After that, we duplicate the layer to make it brighter. Then choose the blending option for the rays of light "Softlight"
The result is shown below

To make it even more sparkling, we can add some colours to the rays of light.
Make a new layer, then use a brush with big size and orange or yellow color to brush as follow the direction of the light. Then we apply "Softlight" blending option to it.
Below is the final version.

Practice 3
This week i continue with another practice. The picture below was made using photoshop. My inspiration came from 2 films "Lost in translation" and " The Da Vinci code". The wave of words in the picture describes the large amount of knowledge flows throughout the universe. It expresses an infinite source of knowledge and the desire to overcome even the vast space of human. When i made this picture, i had a feeling of faraway space, a distance and mysterious world. Somewhere out there, it should exist other entities, other form of life which we never know
I made this picture using the star field layer which i made and the wave of words using Filter->Wave. Other stuff was made using mostly Filter to add effects.

I made this picture using the star field layer which i made and the wave of words using Filter->Wave. Other stuff was made using mostly Filter to add effects.

Đăng ký:
Bài đăng (Atom)